Introduction
The Windows Firewall provides an important layer of protection and a rich interface to configure it. Unfortunately, at the time of writing, the Active Directory Group Policy section for Windows Firewall with Advanced Security does not allow for the concept of item level filter, resulting in a GPO for each policy with different filtering requirements.
For example, if a handful of servers require FTP ports to be open and another group requires RDP to be allowed, you will have to create two separate GPOs.
Over time these GPOs really add up.
The solution to this is to do “Firewall as Code” using PowerShell.
Investigation
Well-behaved applications automatically register firewall rules which means that applications will happily continue to work when the firewall is enabled.
Unfortunately, some applications do not include this as part of their install process. These applications require a manual rule to be configured.
Involve your environment application owners, especially for providing information of running processes and supplying network diagrams. I recommend, however, that you do not directly ask application owners which ports an application needs. I’ve found that if you do that, you will usually get a massive list of irrelevant ports back, mainly because application owners will just give you a list of open ports found on the application servers.
Always check that ports which are required are limited to a specific process. This way you can whitelist the application, allowing all the required ports without actually worrying which protocols or ports are required.
This PowerShell function can be helpful to identify ports used by applications (adapted from http://blogs.microsoft.co.il/scriptfanatic/2011/02/10/how-to-find-running-processes-and-their-port-number/)
function Get-NetworkStatistics
{
    $properties = 'Protocol','LocalAddress','LocalPort'
    $properties += 'RemoteAddress','RemotePort','State','ProcessName','ProcessPath','ProcessCompany','PID'


    netstat -ano | Select-String -Pattern '\s+(TCP|UDP)' | ForEach-Object {


        $item = $_.line.split(" ",[System.StringSplitOptions]::RemoveEmptyEntries)


        if($item[1] -notmatch '^\[::')
        {
            if (($la = $item[1] -as [ipaddress]).AddressFamily -eq 'InterNetworkV6')
            {
               $localAddress = $la.IPAddressToString
               $localPort = $item[1].split('\]:')[-1]
            }
            else
            {
                $localAddress = $item[1].split(':')[0]
                $localPort = $item[1].split(':')[-1]
            }


            if (($ra = $item[2] -as [ipaddress]).AddressFamily -eq 'InterNetworkV6')
            {
               $remoteAddress = $ra.IPAddressToString
               $remotePort = $item[2].split('\]:')[-1]
            }
            else
            {
               $remoteAddress = $item[2].split(':')[0]
               $remotePort = $item[2].split(':')[-1]
            }


            New-Object PSObject -Property @{
                PID = $item[-1]
                ProcessName = (Get-Process -Id $item[-1] -ErrorAction SilentlyContinue).Name
                ProcessPath = (Get-Process -Id $item[-1] -ErrorAction SilentlyContinue).Path
                ProcessCompany = (Get-Process -Id $item[-1] -ErrorAction SilentlyContinue).Company
                Protocol = $item[0]
                LocalAddress = $localAddress
                LocalPort = $localPort
                RemoteAddress =$remoteAddress
                RemotePort = $remotePort
                State = if($item[0] -eq 'tcp') {$item[3]} else {$null}
            } | Select-Object -Property $properties
        }
    }
}
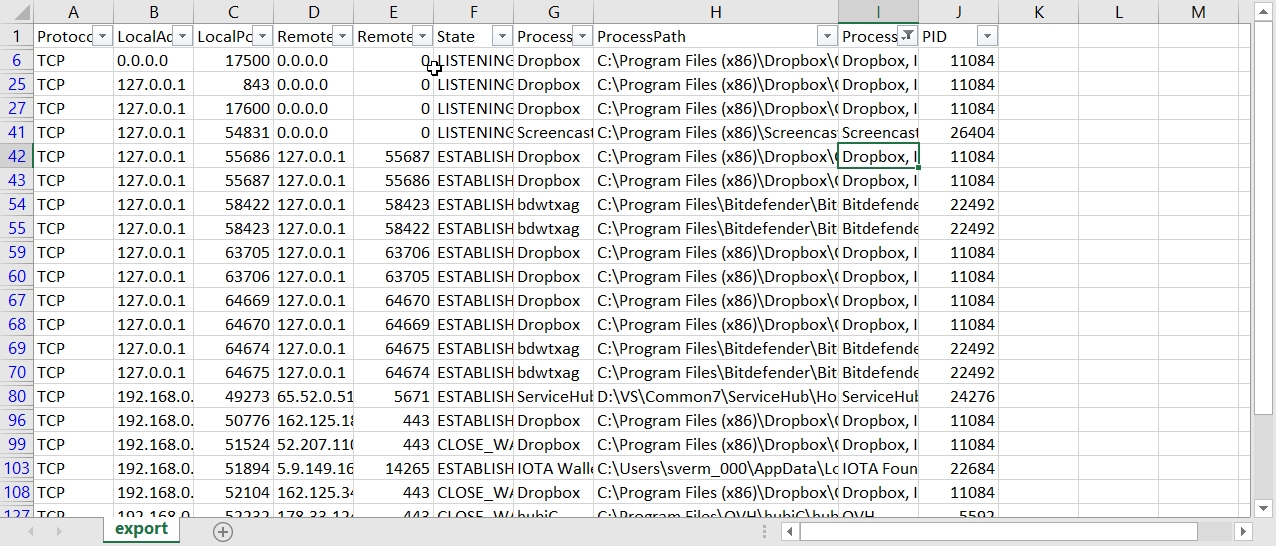
To get a report, run the following after importing the function
Get-NetworkStatistics | Export-Csv -NoTypeInformation .\Ports.csv
Sample export from PowerShell function
Prestage rules
The key to enabling Windows Firewall involves pre-staging firewall rules well in advance of actually flipping the switch. This is achieved with a PowerShell script, executed at an interval on all devices. Conditions within the script selectively create the appropriate rule.
For example, you only want MSSQL firewall rule on servers running MSSQL,
Create PowerShell Script
Although many options exist that would be able to achieve this, I picked PowerShell because of its popularity amongst Windows Administrators.
The PowerShell script to achieve this consists of the following concepts;
- Environmental Variables
- Global Variables
- Local Variables
- Conditions
- Rules
Environmental Variables
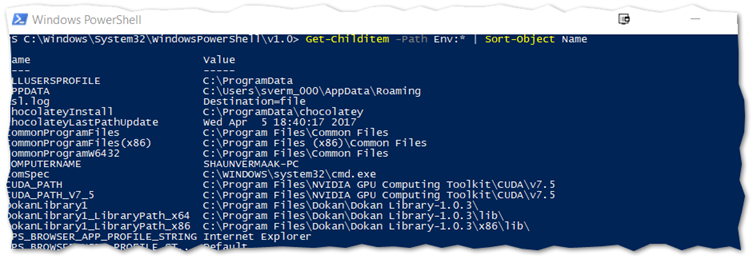
Specifically, to creating path conditions and rules, it is always better to use Environmental variables if the application is installed into one of these common locations.
To get these variable names, use the following PowerShell command
# List PowerShell's Environmental Variables
Get-Childitem -Path Env:* |Sort-Object Name
Global Variables
Global variables are variables that are used multiple times within the script thus, it makes sense to move these to the top of the file so that they are only evaluated once. The only downside to having multiple instances of these throughout the file is that the script will take longer to execute.
Some examples:
Computer account membership
$computerGroupMembers = ([adsisearcher]"(&(objectCategory=computer)(cn=$env:COMPUTERNAME))").FindOne().Properties.memberof -replace '^CN=([^,]+).+$','$1';
Application registry key
$SqlKey = Get-ChildItem -ErrorAction SilentlyContinue "HKLM:\SOFTWARE\Microsoft\Microsoft SQL Server";
Computer system information
$Computer = Get-WmiObject -Class Win32_ComputerSystem
Local Variables
When a variable is changed from one condition to another and/or needs to be re-evaluated from one condition to the next, use a local variable.
Conditions
Conditions determine if a particular rule will be applied. That said, a rule without a condition is considered a global rule because it applies to all devices
Some examples:
Domain Roles
switch -regex ($computer.DomainRole)
{
    "0|1"
    { #Rules for workstations go here }
    "2|3"
    { #Rules for servers go here }
    "4|5"
    { #Rules for domain controllers go here }
}
Group membership
If ($computerGroupMembers -contains "Group01") { #Rules go here }
Multiple group membership
If ($computerGroupMembers -contains "Group01" -or $computerGroupMembers -contains "Group01") { #Rules go here }
Application binary exists at path using environmental variables
If (Test-Path -Path "$($Env:programfiles)\SomePath\SomeApp.exe"){ #Rules go here }
If (Test-Path -Path "$($Env:SystemDrive)\SomePath\SomeApp.exe "){ #Rules go here }
If (Test-Path -Path "$(${Env:ProgramFiles(x86)})\SomePath\SomeApp.exe") { #Rules go here }
Application binary running (notice the local variable)
$processPath = (Get-Process -Name SomeProcessName).path;
If (Test-Path -Path "$($processPath)") { #Rules go here }
Rules
Each rule name must be unique and descriptive and if applicable to a specific protocol, add the protocol to the rule name within parentheses.
Please note: PowerShell has a powerful CMDLet called New-NetFirewallRule that vastly simplifies the addition of firewall rule. Unfortunately, older versions of PowerShell do not contain it and as such, NETSH is used because it is compatible with more devices. The downside of NETSH is that we first need to delete the rule to ensure we do not create duplicate rules on subsequent executions.
Some examples:
Management range that bypass firewall completely
netsh advfirewall firewall delete rule name="Sample Rule Name"
netsh advfirewall firewall add rule name="Sample Rule Name" protocol=any action=allow dir=IN remoteip=10.1.1.0/24,10.2.2.0/24,10.3.3.0/24
TCP single port rule
netsh advfirewall firewall delete rule name="FTP (TCP)"
netsh advfirewall firewall add rule name="FTP (TCP)" protocol=6 action=allow dir=IN localport="21"
TCP multiple port ranges rule
netsh advfirewall firewall delete rule name="Sample Rule Name (TCP)"
netsh advfirewall firewall add rule name="Sample Rule Name (TCP)" protocol=6 action=allow dir=IN localport="900,1000-2000,3000-4000"
TCP and UDP port range rule
netsh advfirewall firewall delete rule name="Sample Rule Name (TCP)"
netsh advfirewall firewall delete rule name="Sample Rule Name (UDP)"
netsh advfirewall firewall add rule name="Sample Rule Name (TCP)" protocol=6 action=allow dir=IN localport="1000-2000"
netsh advfirewall firewall add rule name="Sample Rule Name (UDP)" protocol=17 action=allow dir=IN localport="1000-2000"
Absolute path application rule
netsh advfirewall firewall delete rule name="Sample Rule Name"
netsh advfirewall firewall add rule name="Sample Rule Name" dir=in action=allow program="C:\SomePath\SomeApp.exe"
Multiple combined environmental variable application rules
netsh advfirewall firewall delete rule name="Sample Rule Name 01"
netsh advfirewall firewall delete rule name="Sample Rule Name 02"
netsh advfirewall firewall delete rule name="Sample Rule Name 03"
netsh advfirewall firewall add rule name="Sample Rule Name 01" dir=in action=allow program="$($Env:programfiles)\SomePath\SomeApp.exe"
netsh advfirewall firewall add rule name="Sample Rule Name 02" dir=in action=allow program="$($Env:ProgramFiles(x86))\SomePath\SomeApp.exe"
netsh advfirewall firewall add rule name="Sample Rule Name 02" dir=in action=allow program="$($Env:SystemDrive)\SomePath\SomeApp.exe"
Using local variable
netsh advfirewall firewall delete rule name="Sample Rule Name"
netsh advfirewall firewall add rule name="Sample Rule Name" dir=in action=allow program="$($processPath)"
Predefined rules
netsh advfirewall firewall set rule group="remote desktop" new enable=yes
Firewall.ps1 example
$computerGroupMembers = ([adsisearcher]"(&(objectCategory=computer)(cn=$env:COMPUTERNAME))").FindOne().Properties.memberof -replace '^CN=([^,]+).+$','$1';
$SqlKey = Get-ChildItem -ErrorAction SilentlyContinue "HKLM:\SOFTWARE\Microsoft\Microsoft SQL Server";

If ($computerGroupMembers -contains "FirewallAllowFTP")
{
    netsh advfirewall firewall delete rule name="FTP (TCP)"
    netsh advfirewall firewall add rule name="FTP (TCP)" protocol=6 action=allow dir=IN localport="21"
}

If ($computerGroupMembers -contains "FirewallAllowRDP")
{
    netsh advfirewall firewall set rule group="remote desktop" new enable=yes
}

If (Test-Path -Path "$($Env:SystemDrive)\App\bin\Engine.exe")
{
    netsh advfirewall firewall delete rule name="App01"
    netsh advfirewall firewall add rule name="App02" dir=in action=allow program="$($Env:SystemDrive)\App\bin\App.exe"
}

If ($SqlKey -ne $null)
{
    netsh advfirewall firewall delete rule name="MSSQL - SQL Server"
    netsh advfirewall firewall delete rule name="MSSQL - SQL Admin Connection"
    netsh advfirewall firewall delete rule name="MSSQL - SQL Database Management"
    netsh advfirewall firewall delete rule name="MSSQL - SQL Service Broker"
    netsh advfirewall firewall delete rule name="MSSQL - SQL Debugger/RPC"
    netsh advfirewall firewall delete rule name="MSSQL - SQL Server Browse Button Service"
    netsh advfirewall firewall delete rule name="MSAS - SQL Analysis Services"
    netsh advfirewall firewall delete rule name="MSAS - SQL Browser"
    netsh advfirewall firewall delete rule name="MSRS - HTTP"
    netsh advfirewall firewall delete rule name="MSRS - SSL"

    netsh advfirewall firewall add rule name="MSSQL - SQL Server" dir=in action=allow protocol=TCP localport=1433
    netsh advfirewall firewall add rule name="MSSQL - SQL Admin Connection" dir=in action=allow protocol=TCP localport=1434
    netsh advfirewall firewall add rule name="MSSQL - SQL Database Management" dir=in action=allow protocol=UDP localport=1434
    netsh advfirewall firewall add rule name="MSSQL - SQL Service Broker" dir=in action=allow protocol=TCP localport=4022
    netsh advfirewall firewall add rule name="MSSQL - SQL Debugger/RPC" dir=in action=allow protocol=TCP localport=135
    netsh advfirewall firewall add rule name="MSSQL - SQL Server Browse Button Service" dir=in action=allow protocol=UDP localport=1433
    netsh advfirewall firewall add rule name="MSAS - SQL Analysis Services" dir=in action=allow protocol=TCP localport=2383
    netsh advfirewall firewall add rule name="MSAS - SQL Browser" dir=in action=allow protocol=TCP localport=2382
    netsh advfirewall firewall add rule name="MSRS - HTTP" dir=in action=allow protocol=TCP localport=80
    netsh advfirewall firewall add rule name="MSRS - SSL" dir=in action=allow protocol=TCP localport=443

    $SubKeys = Get-ChildItem "HKLM:\SOFTWARE\Microsoft\Microsoft SQL Server";
    ForEach ($SubKey in $SubKeys)
    {
        If ($SubKey.Name.Contains("\MSSQL") -And !$SubKey.Name.Contains("\MSSQLServer"))
        {
           $InstanceName = $SubKey.Name.Split("\")[4]
           $RegistryKey = Get-ItemProperty "HKLM:$($SubKey.Name)\Setup" -name SQLBinRoot;
           $EXEPath = "$($RegistryKey.SQLBinRoot)\sqlservr.exe";

           netsh advfirewall firewall delete rule name="MSSQL - $($InstanceName)"
           netsh advfirewall firewall add rule name="MSSQL - $($InstanceName)" dir=in action=allow program="$($EXEPath)"
        }
        If ($SubKey.Name.Contains("\MSAS"))
        {
            $InstanceName = $SubKey.Name.Split("\")[4]
            $RegistryKey = Get-ItemProperty "HKLM:$($SubKey.Name)\Setup" -name SQLBinRoot;
            $EXEPath = "$($RegistryKey.SQLBinRoot)\msmdsrv.exe";

            netsh advfirewall firewall delete rule name="MSAS - $($InstanceName)"
            netsh advfirewall firewall add rule name="MSAS - $($InstanceName)" dir=in action=allow program="$($EXEPath)"
        }
    }
}
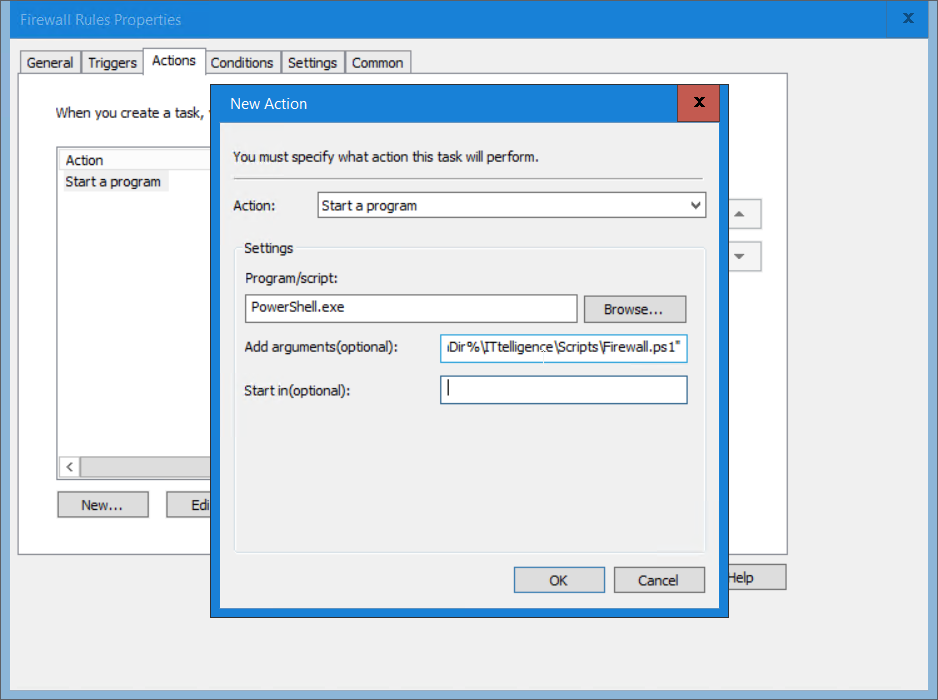
Implementation
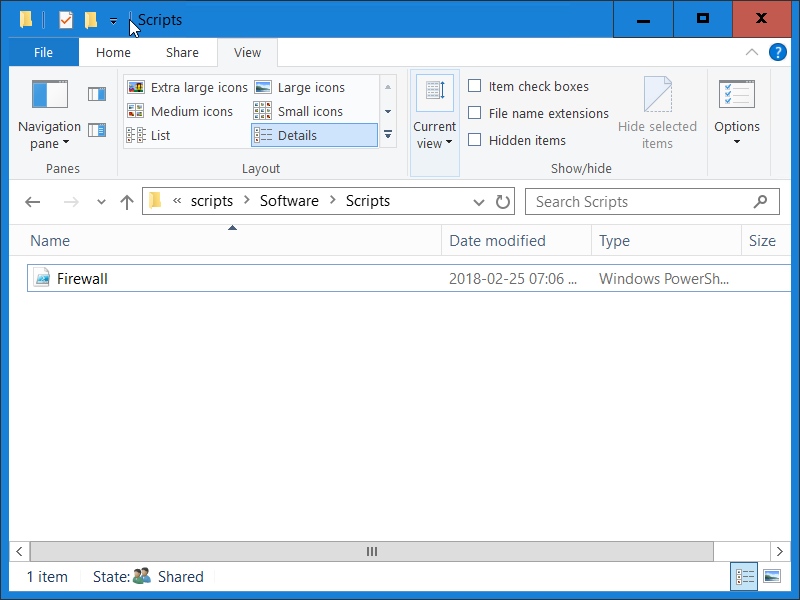
1) Copy Firewall.ps1 to shared location (\\ittelligence.com\NETLOGON\Software\Scripts in this case)
2) Deploy file via GPO Files Preferences

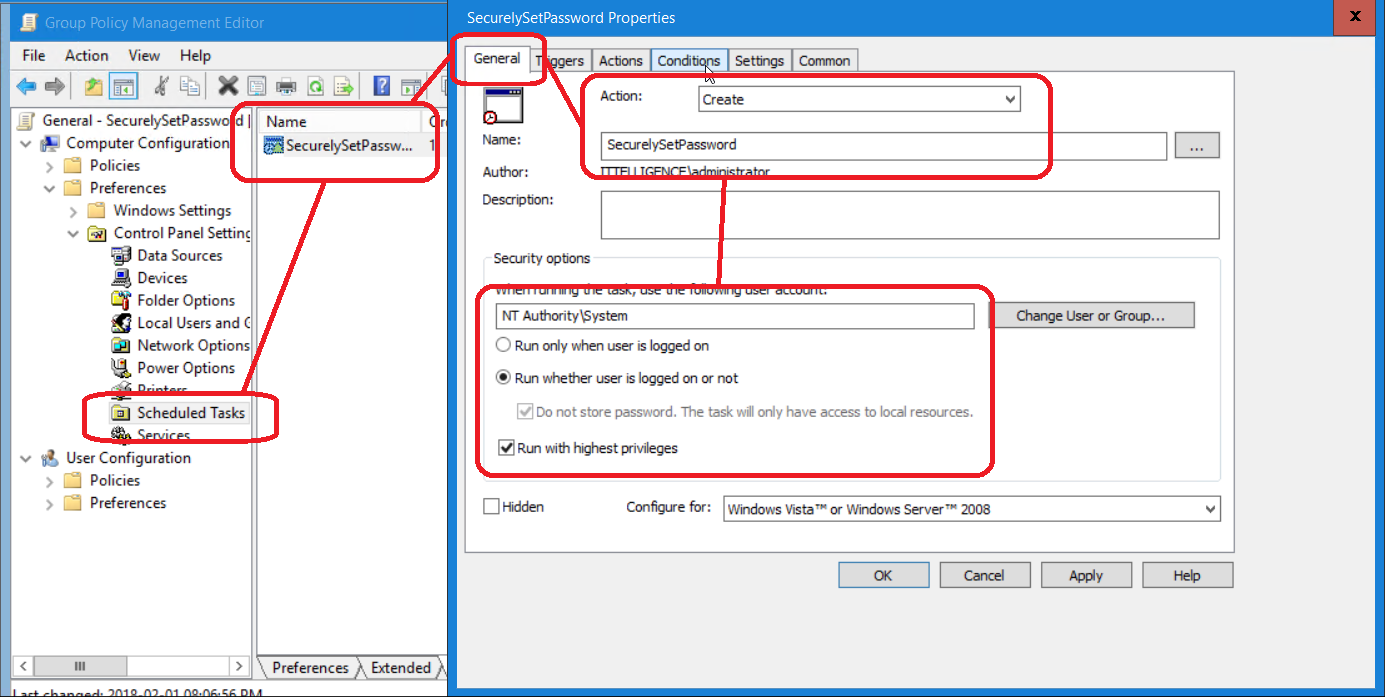
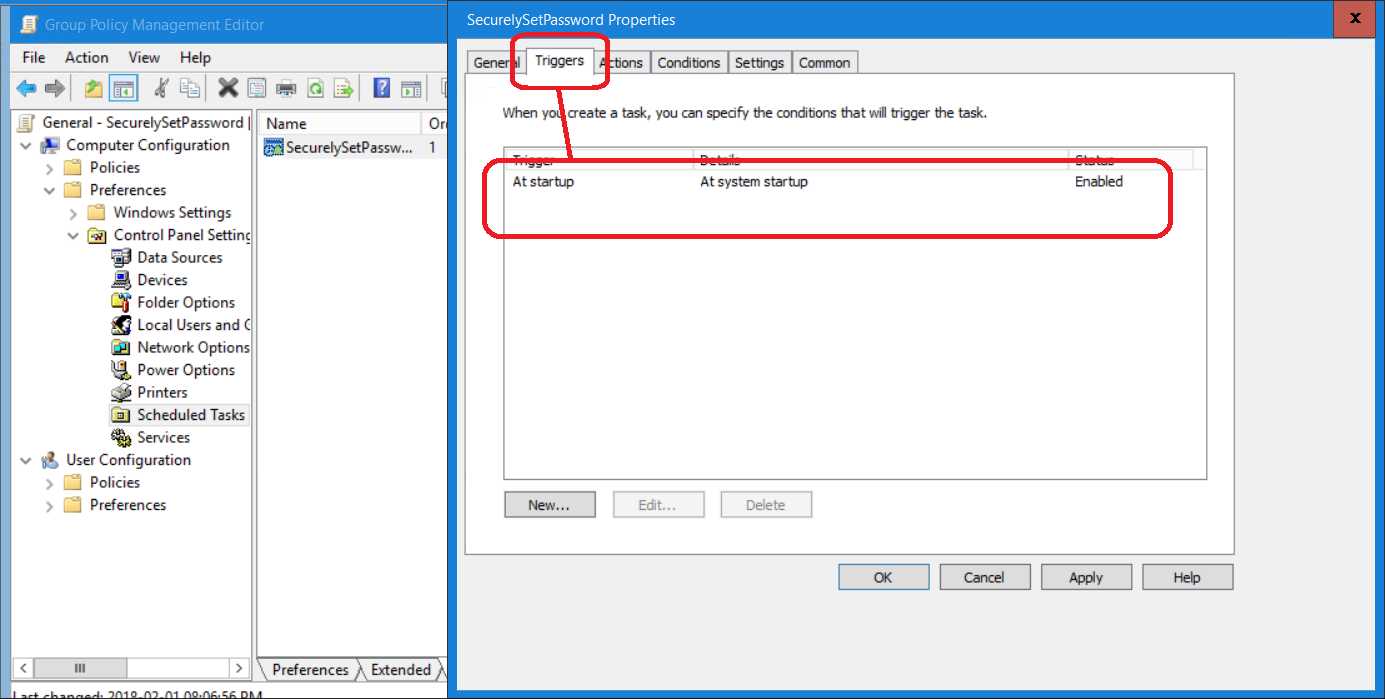
3) Create a scheduled task with GPO Scheduled Tasks running as NT AUTHORITY\SYSTEM
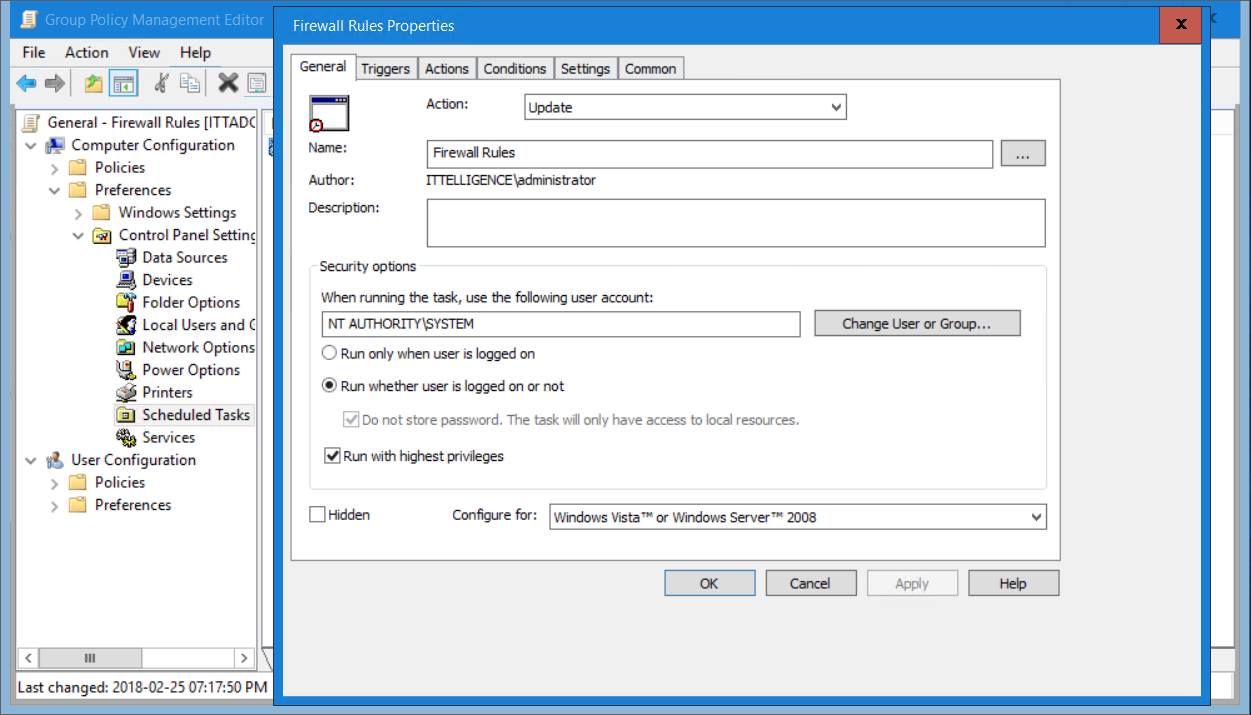
4) Specify the following as options;
Program/scripts: PowerShell.exe
Add arguments (optional): -ExecutionPolicy Bypass -File “%CommonAppdataDir%\ITtelligence\Scripts\Firewall.ps1”
5) After running this GPO for a few days do some spot checks. If rules are creating successfully, enable the firewall.