Prerequisites: The following assumptions have been made in this tutorial. Readers should have a basic working knowledge of Microsoft Active Directory, SQL Server and Visual Studio software.
Step 1: Create ACTIVE DIRECTORY SERVICE ACCOUNT
Create an Active directory service account with password reset as well as user account unlock permissions.
Step 2: Download Visual Studio Project
1) Download the provided source zip file by clicking this link (See below)
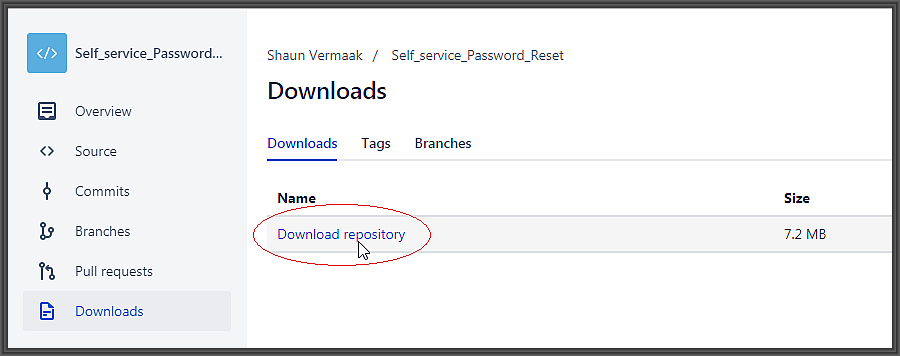
2) Extract and open the project in Visual Studio
Step 3: Create database
Note: The basic steps for creating the database are listed below. Explaining MS SQL functionality is beyond the scope of this article, but I am happy to answer any questions in the comments section below.
1) From the Open Project in Visual Studio, open ModelSSPR.edmx
2) Right-click on white-space on the diagram page
3) Then select Generate Database from Model as shown below
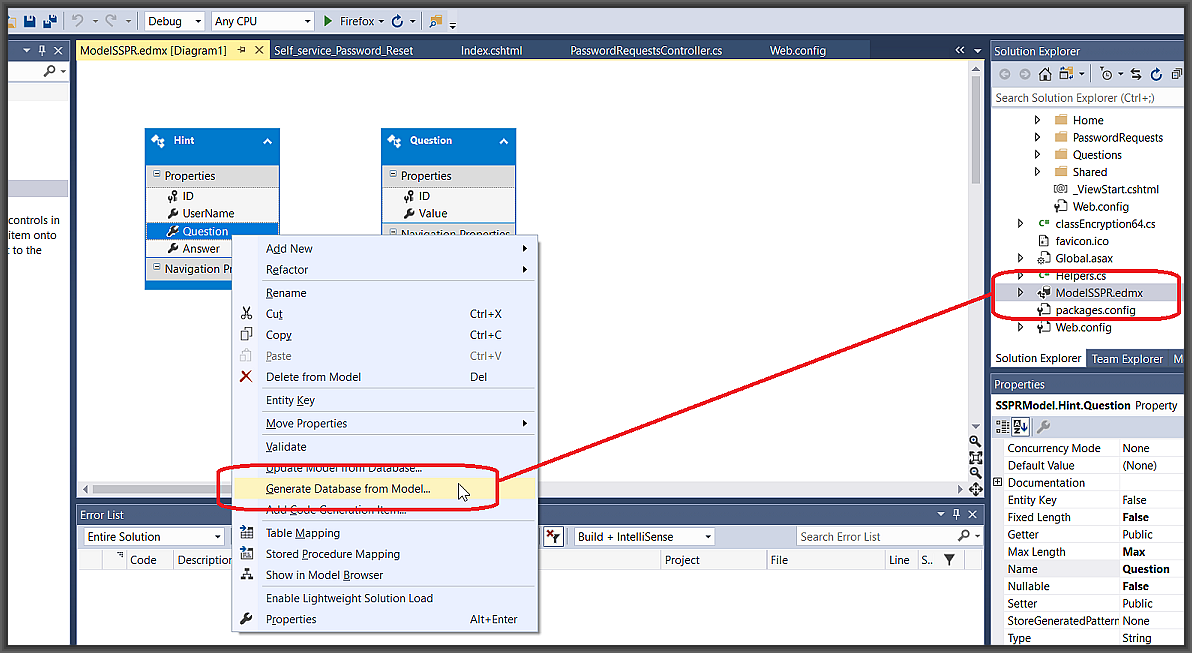
4) Save the SQL script and use it on Microsoft SQL Server to build the database schema
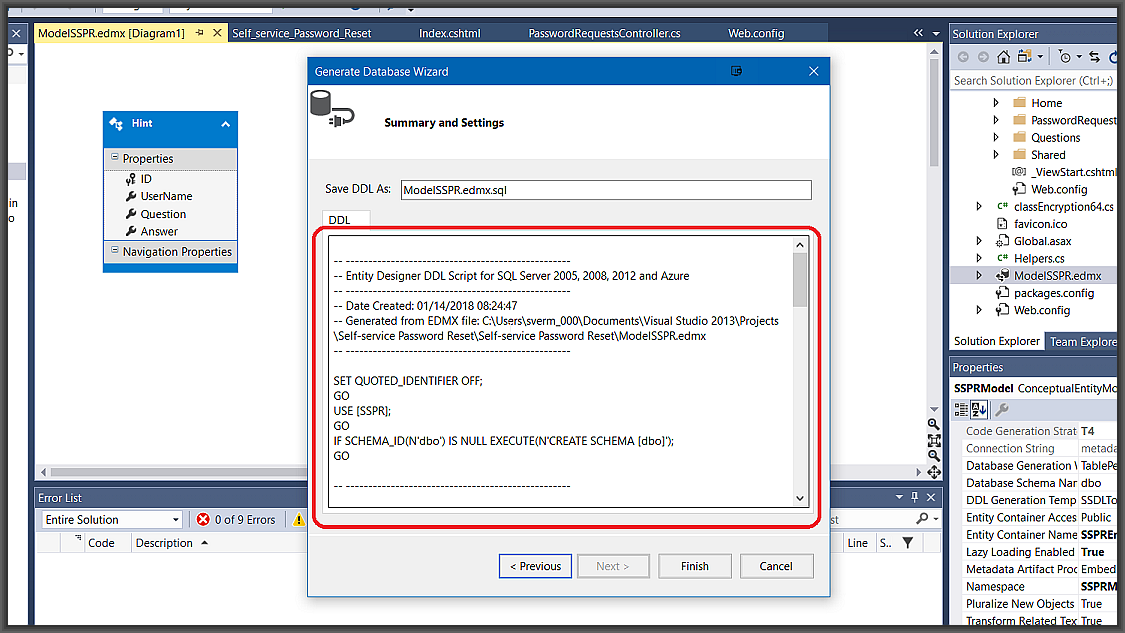
5) Create an MS SQL user and grant it DB owner rights
step 4: Modify config file
1) From the open project in Visual Studio
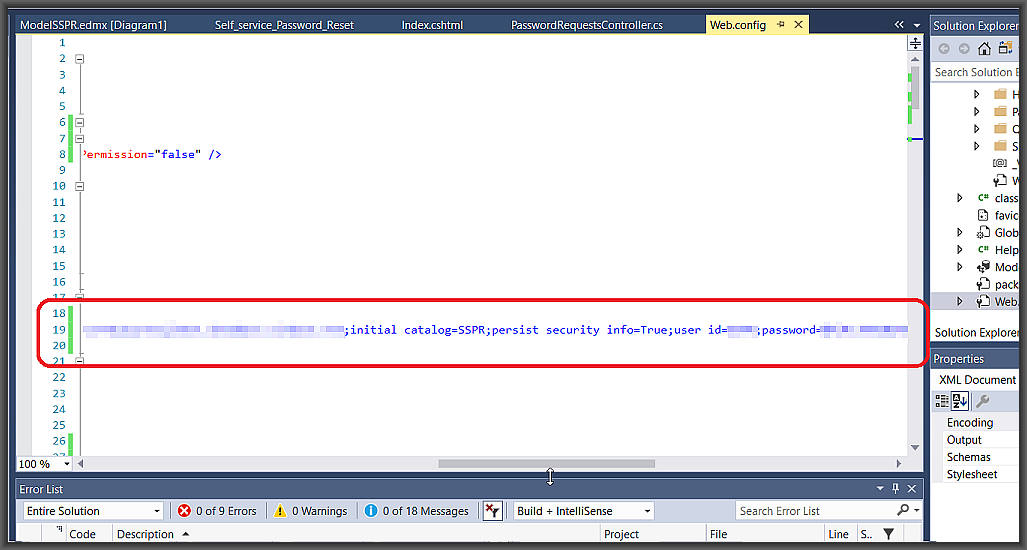
2) Replace the ADConnectionString connection string with the Active Directory LDAP string for the domain used in the Create Active Directory Service Account (Step 1)
3) Replace the SSPREntities connection string with the connection string of the database used in the Create Database (Step 3)
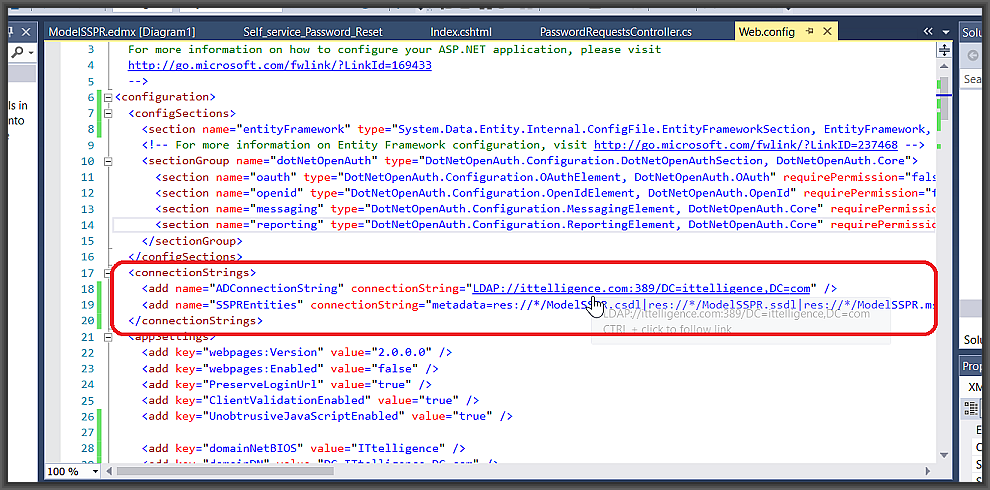
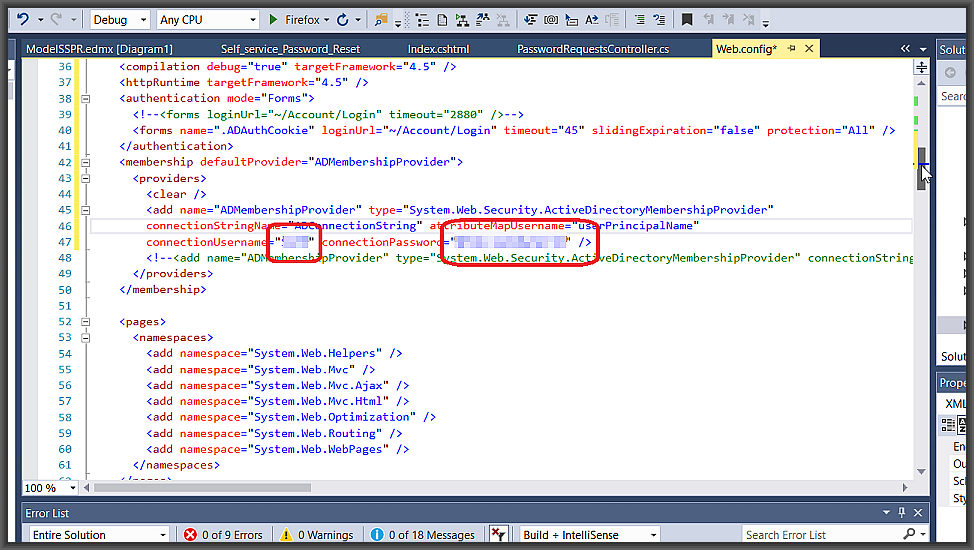
4) Configure ADMembershipProvider to the account created in the Create Active Directory Service Account (Step 1)
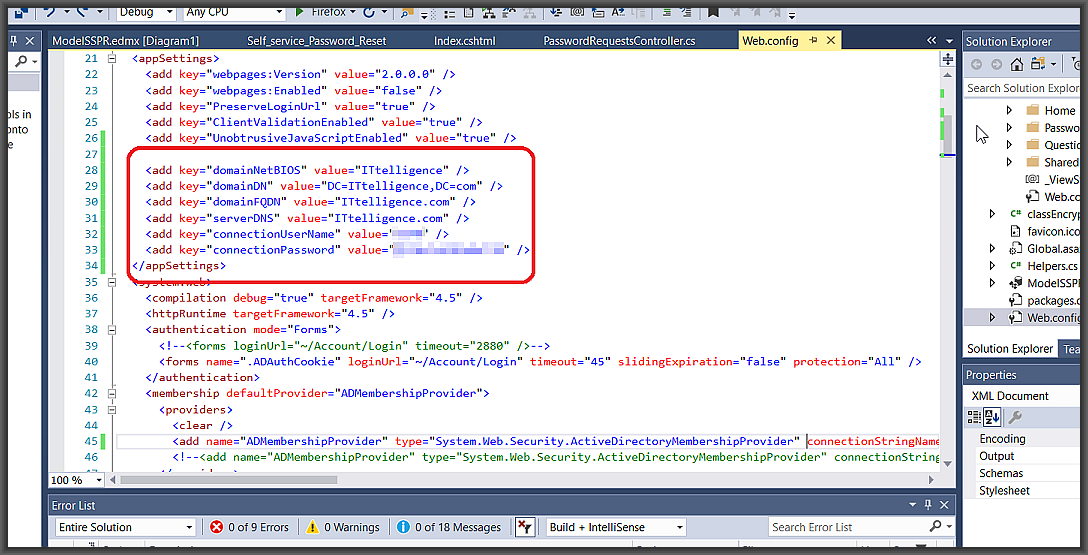
5) Replace the appSettings values with the correct information for the domain and account used in the Create Active Directory Service Account (Step 1)
Step 5: Publish Site
Please Note: Explaining Visual Studio publishing is beyond the scope of this article, but I am happy to answer any questions in the comments section below.
1) From the open project in Visual Studio
2) Publish site with the Visual Studio Publishing wizard

step 6: Testing Site
Registering password hints
1) Browse to site published in Publish Site (Step 5)
2) Click on Log in

3) Specify the Username and Password for the account to register for self-service password reset.
Note: Username must be in UPN format

4) Create password hints by adding questions and answers
Note: At least four hints need to be specified to utilize the self-service password reset function.

Self-Service Password Reset Request
1) Browse to the site published in the Publish Site (Step 5)
2) Click on Reset Password

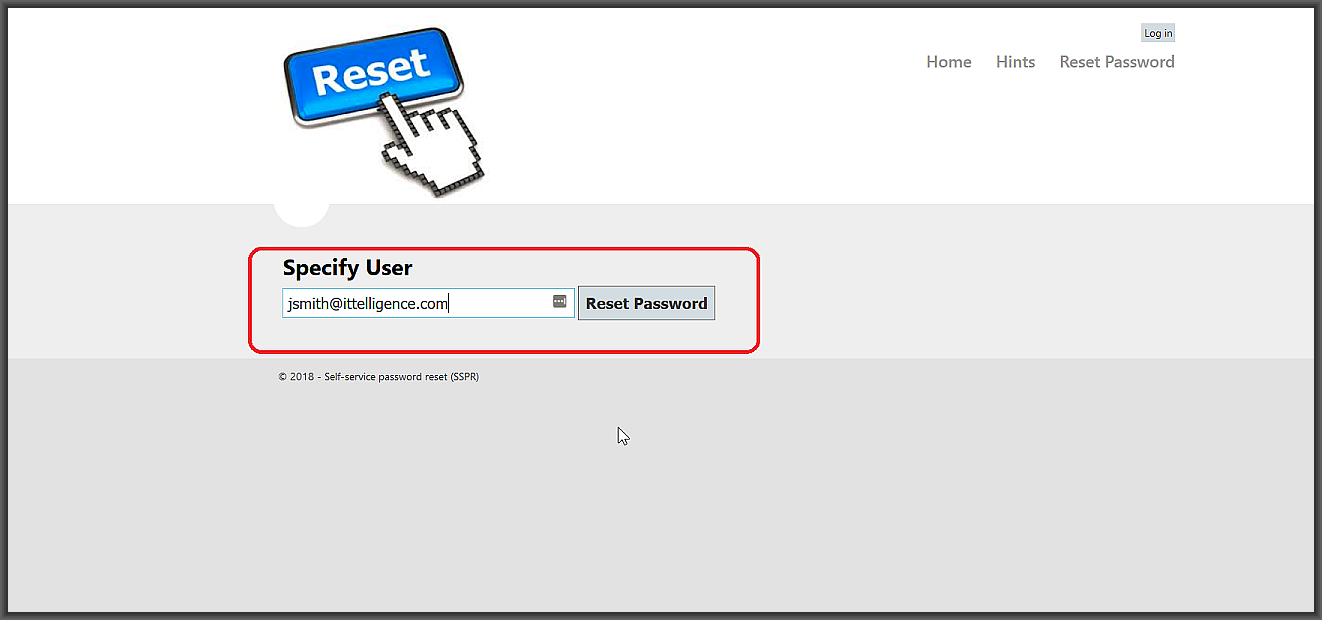
3) Enter the Username for the account to reset the password for as shown below
Note: Username must be in UPN format
4) Enter answers to the security questions and provide new password
Note: Three random questions will be selected out of the hints configured
5) Click Reset Password
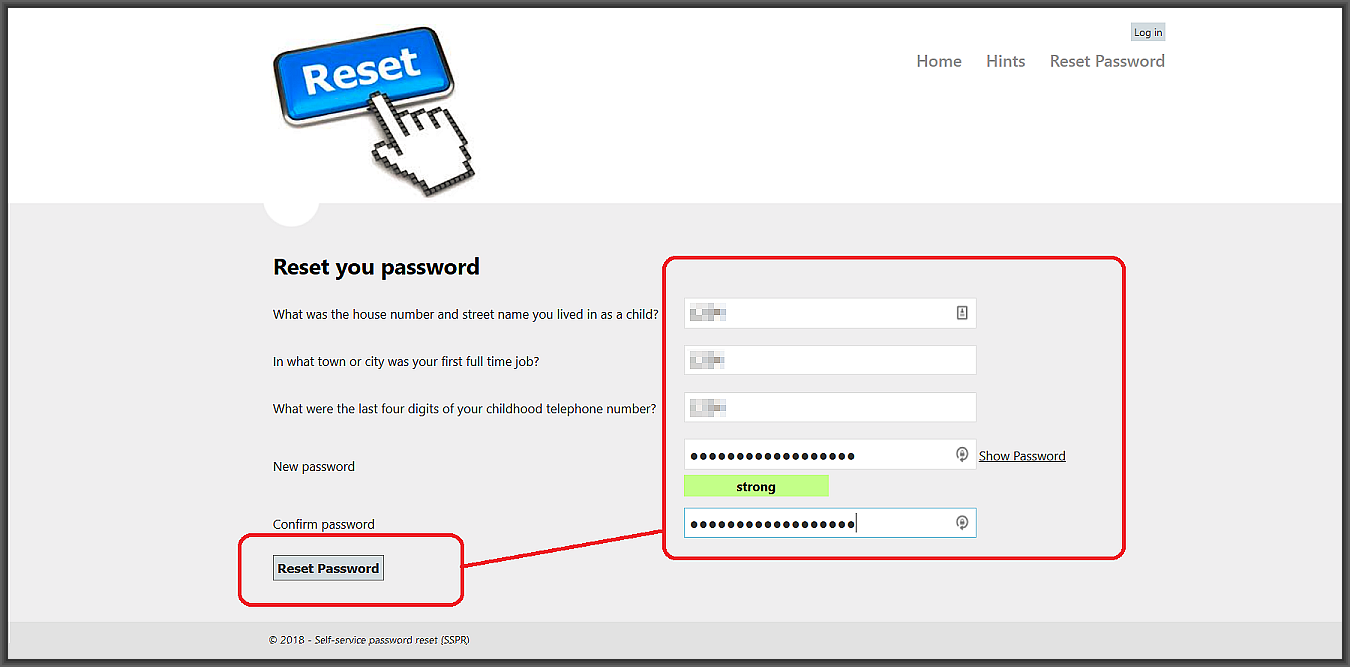
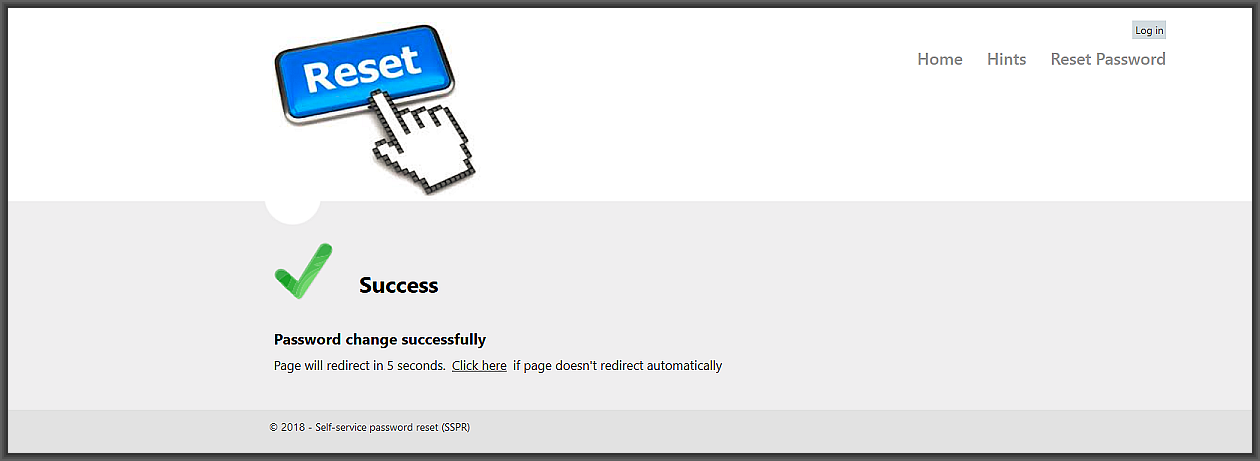
6) If the password was successfully reset, the following screen will display
I hope you found this tutorial useful. You are encouraged to ask questions, report any bugs or make any other comments about it below.